

Documentation » Connect Claude
Connect Claude
Connect Kafkai to Claude on the web (claude.ai), in the Claude Desktop app, in Claude Code, and in Claude Code on the web (claude.ai/code). All of them use the same server URL:
https://kafkai.com/mcp
Custom connectors are available on every claude.ai plan; a free plan allows one. On Team and Enterprise plans an organization owner adds the connector first (see below). Anthropic moves these menus from time to time — if the steps below do not match what you see, search Claude's settings for "connectors".
claude.ai and Claude Desktop
1. Open the connector list
Open Settings. Under Customize, choose Connectors, then choose Add at the top right.
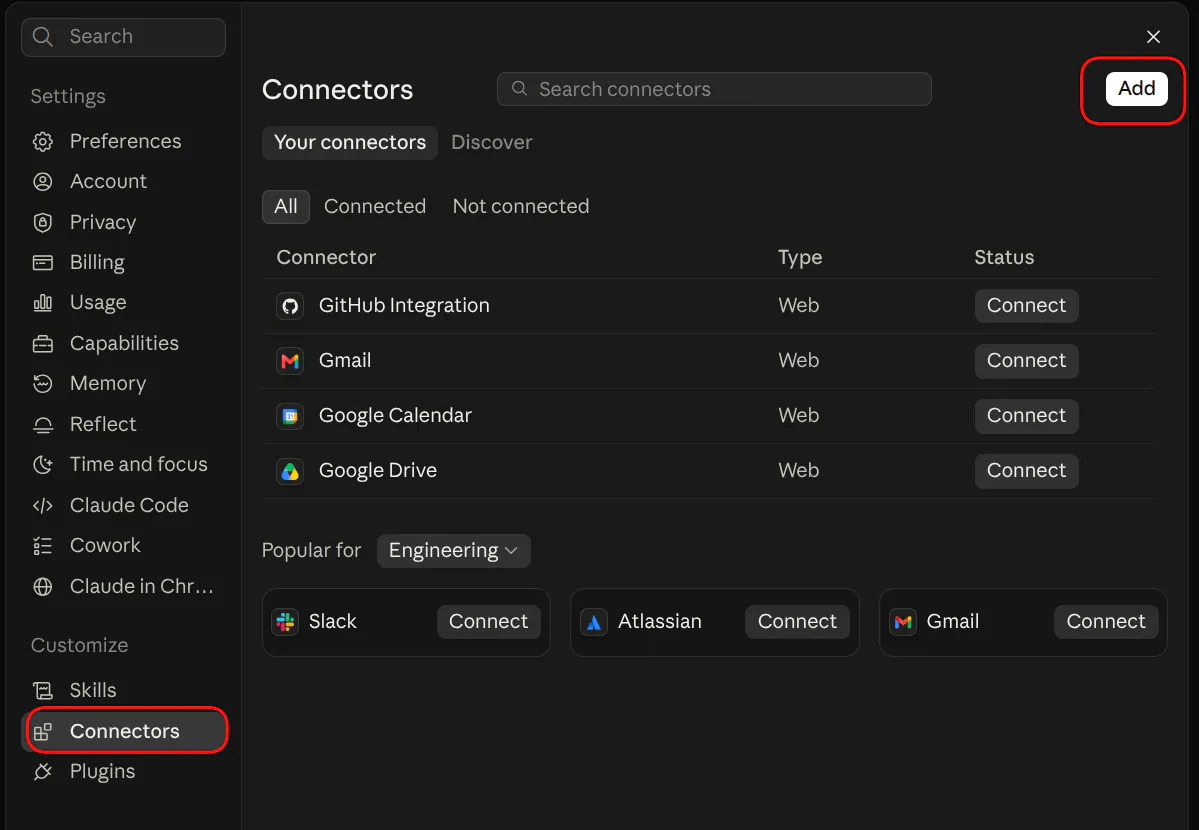
2. Name the connector and enter the server URL
Enter a name (for example Kafkai MCP Service) and the server URL
https://kafkai.com/mcp, then choose Continue.
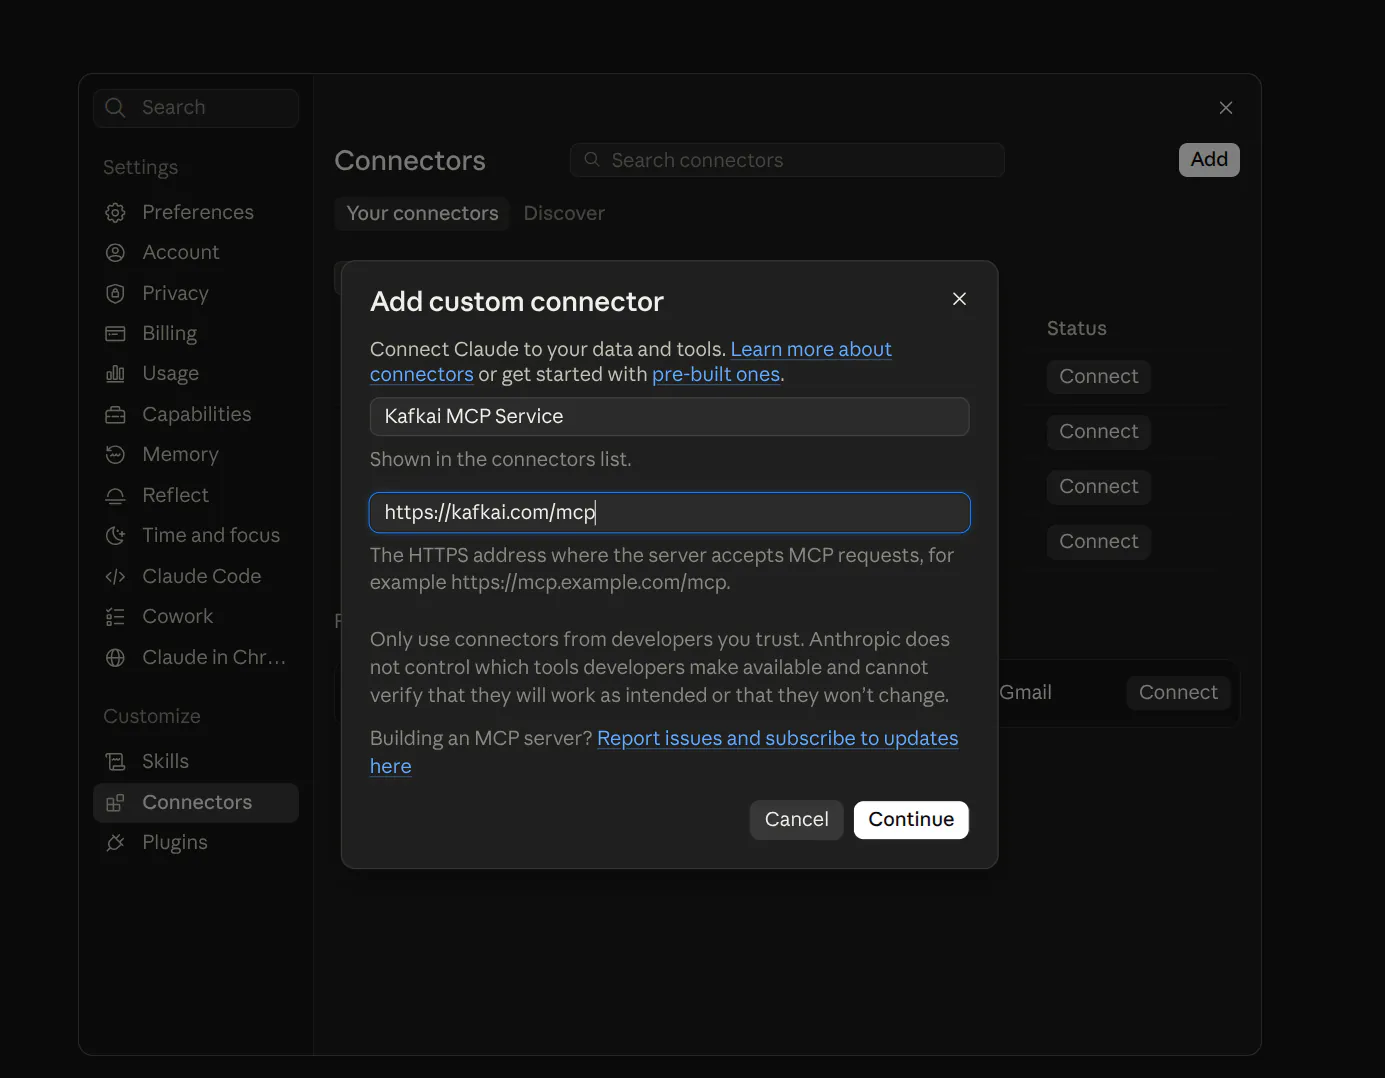
3. Confirm the sign-in settings
Claude reads the sign-in settings from the Kafkai server and marks them Detected: Sign in now under Authentication and Register automatically under OAuth client. Leave both as they are — there is no client ID or secret to enter — and choose Add.
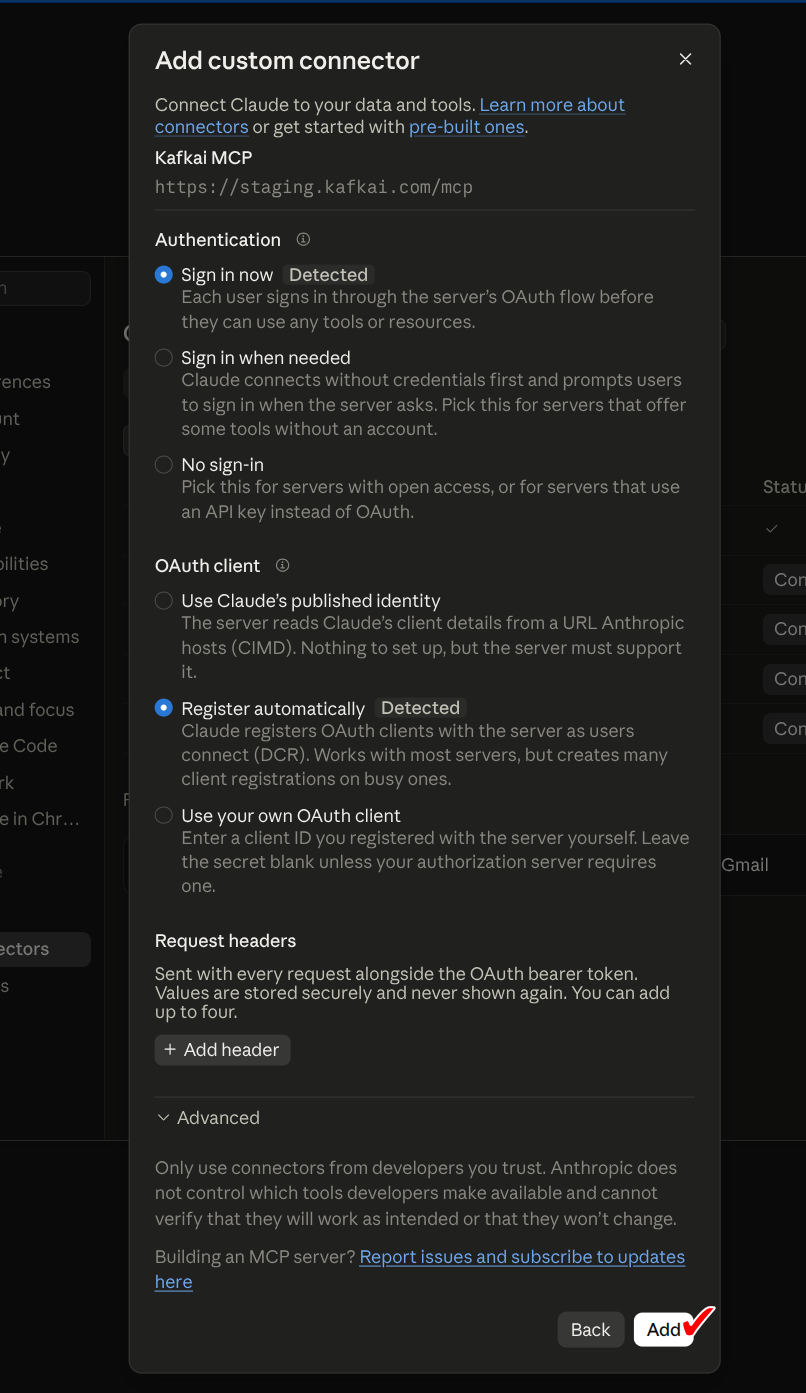
4. Connect
The connector page opens and shows that you are not connected yet. Choose Connect.
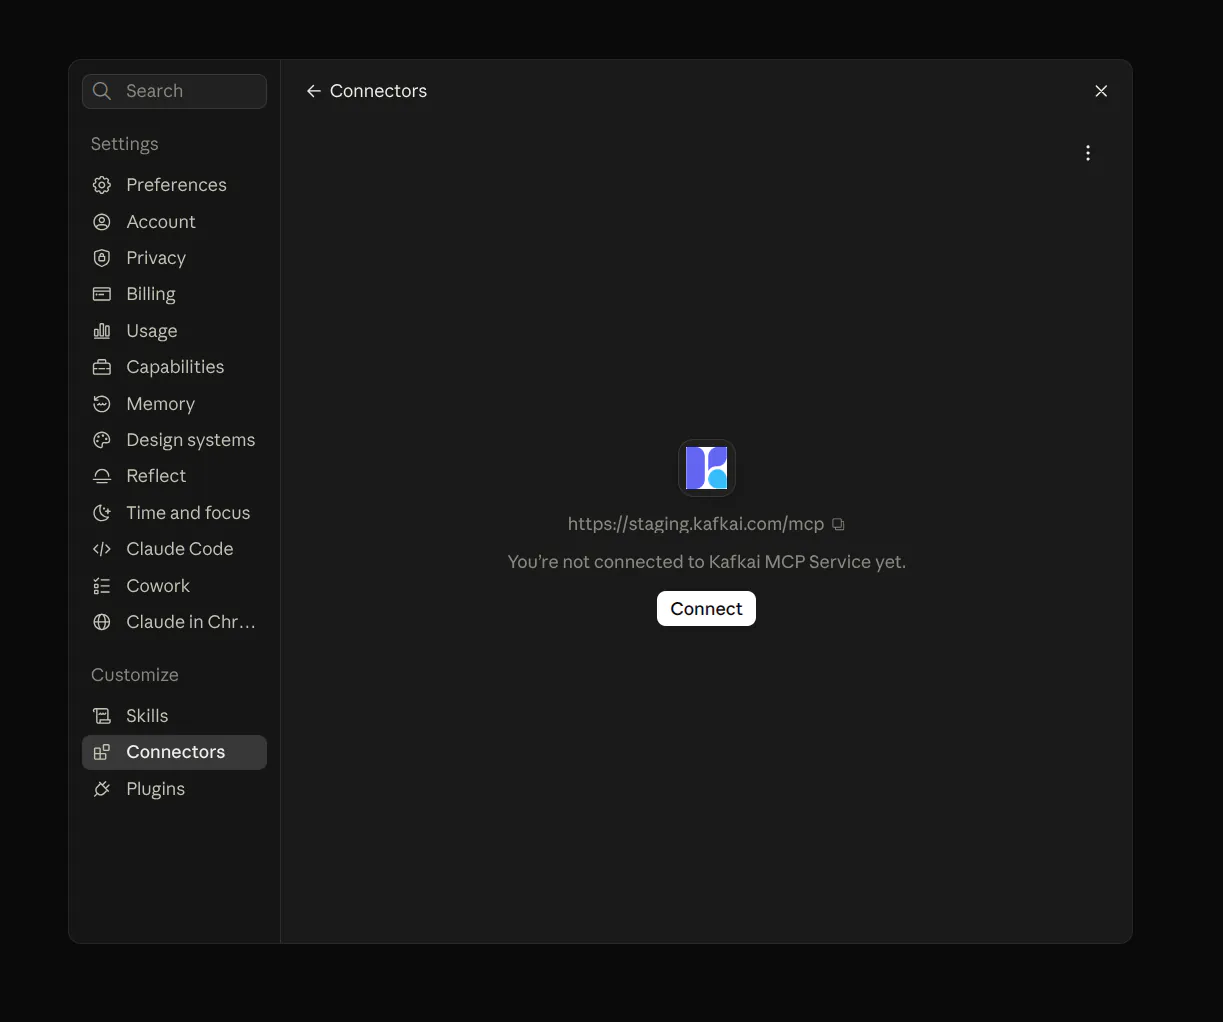
5. Allow the access
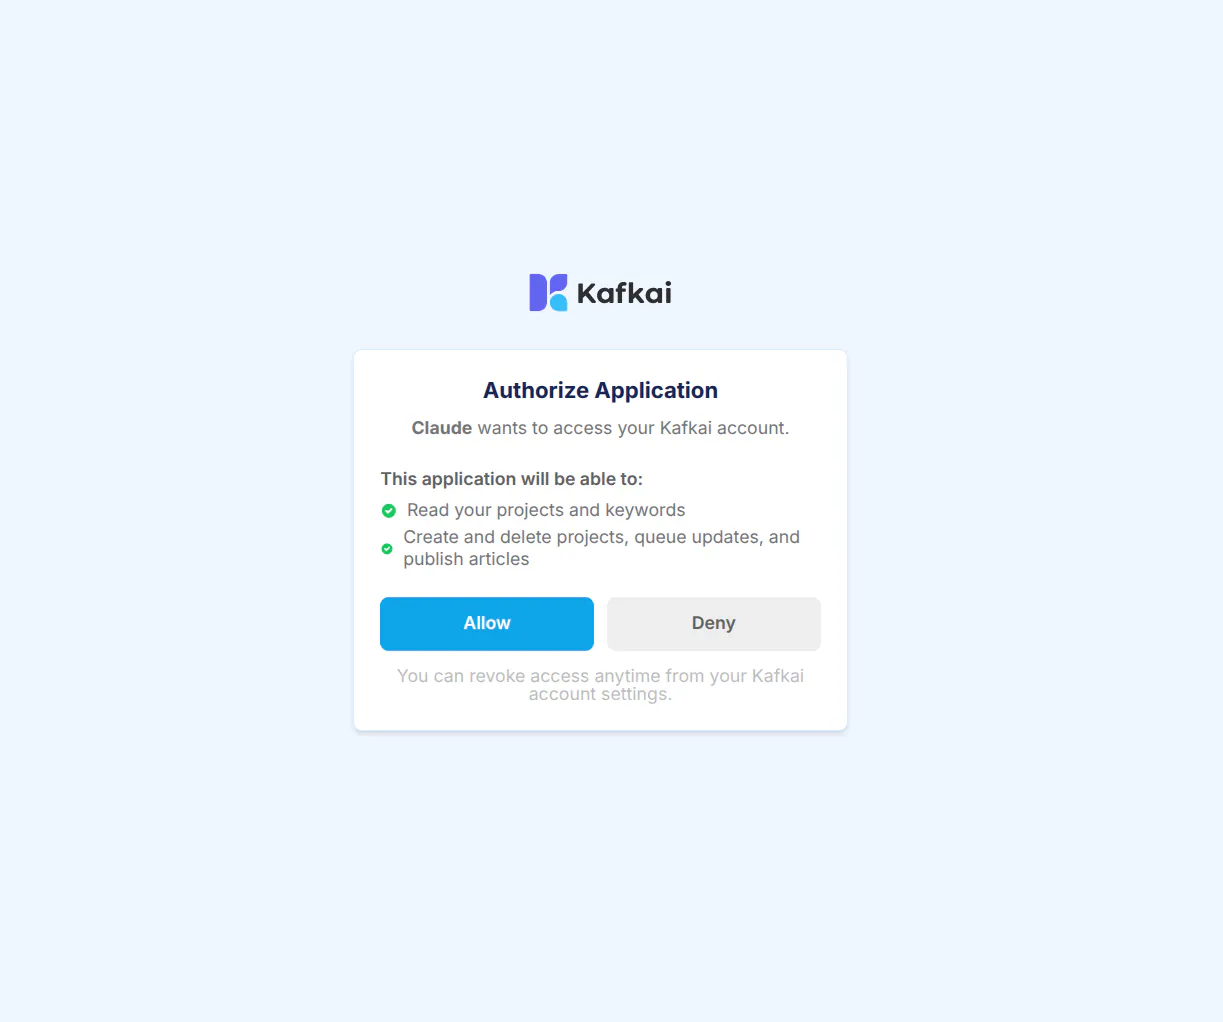
A Kafkai page opens: Claude wants to access your Kafkai account. Sign in if asked, then choose Allow.
6. Decide when Claude may use the tools
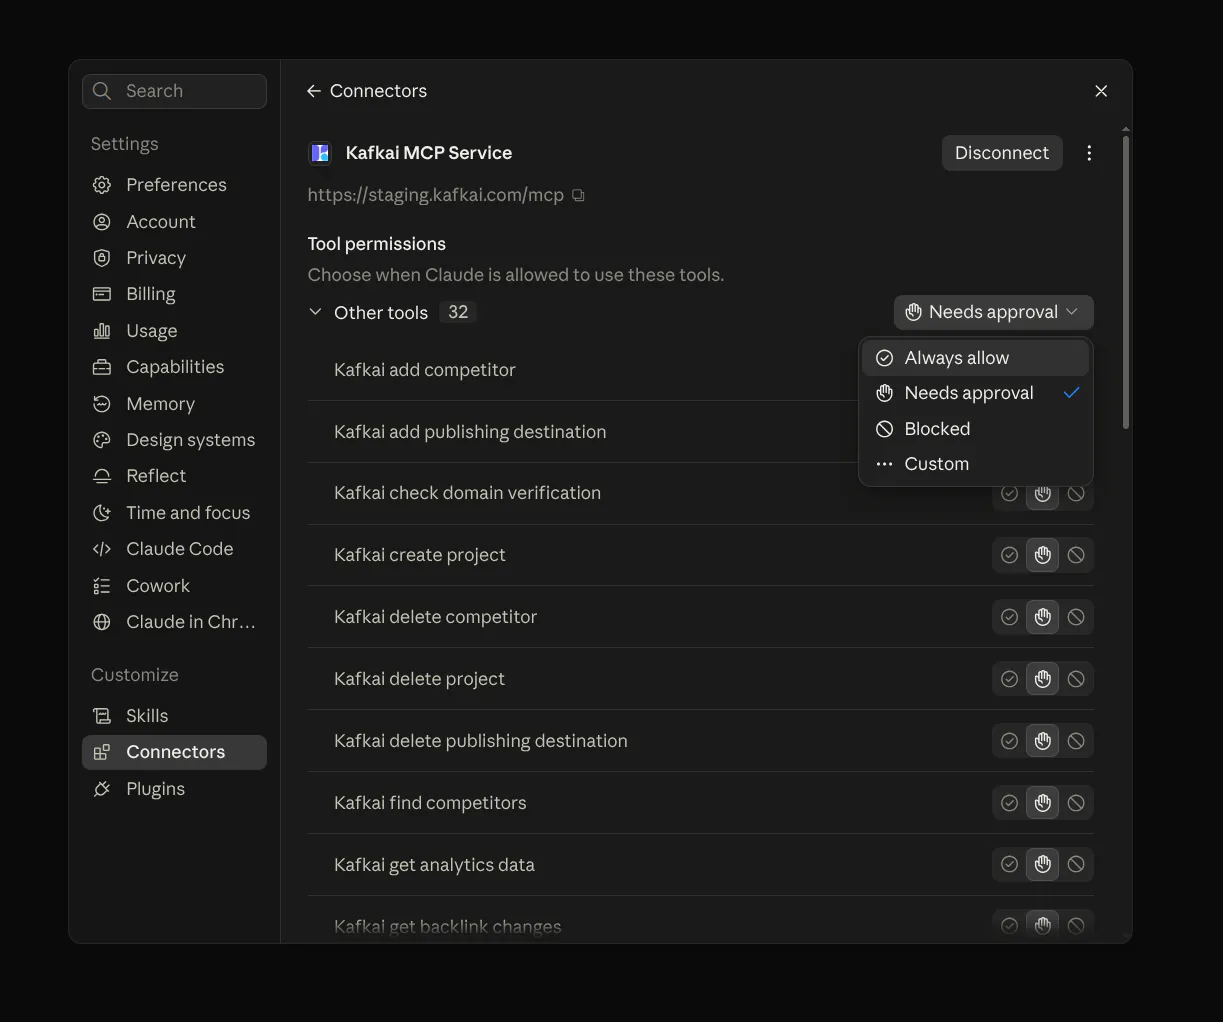
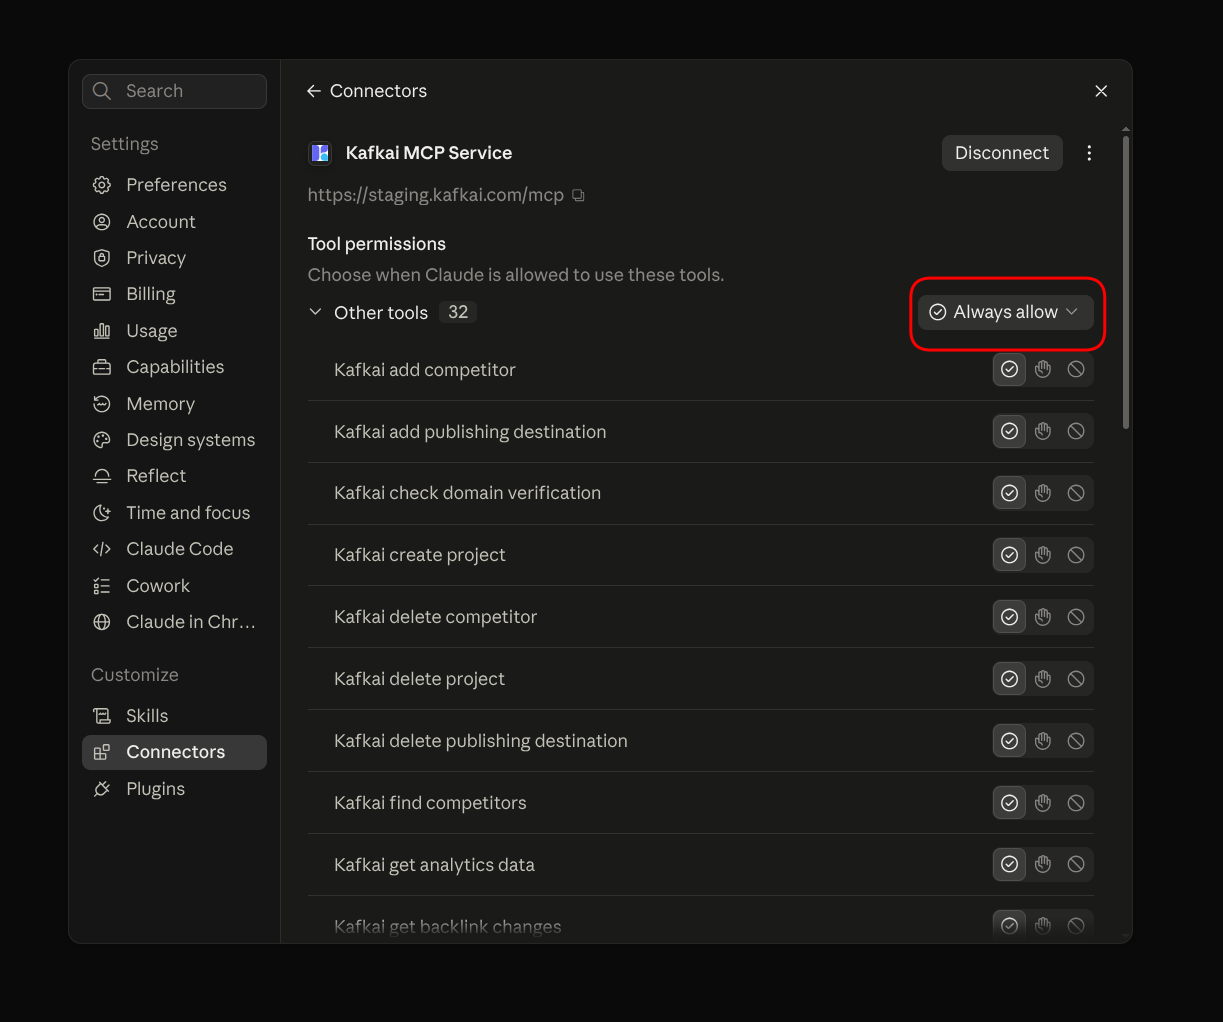
Return to the connector page. Tool permissions lists every Kafkai tool. The default, Needs approval, makes Claude ask you before each call. To let Claude work through a whole analysis without stopping, set the dropdown at the top of the list to Always allow. You can also set each tool on its own.
Kafkai's delete tools return a preview first and delete only on a second, confirmed call, so Always allow never lets Claude delete a project or a competitor in one step.
That completes the setup. Claude handles registration and token refresh automatically from that point on. In a chat, open the + menu, choose Connectors, and turn Kafkai on if it is not already active.
Claude Desktop shares your claude.ai connectors, so it needs no separate setup.
Team and Enterprise plans
Members cannot add custom connectors themselves. An owner or admin adds it once:
- Open Organization settings, then Connectors.
- Choose Add, hover over Custom, and select Web.
- Enter the server URL above and choose Add.
Each member then opens Customize, then Connectors, finds Kafkai, and chooses Connect to sign in with their own Kafkai account.
Claude Code on the web
Sessions at claude.ai/code receive the connectors
from your claude.ai account. Add Kafkai in claude.ai as described above and it
is available in every new web session. There is nothing to configure inside the
session, and claude mcp add does not apply there.
Claude Code in the terminal
If you sign in to Claude Code with your claude.ai account, the connector you
added in claude.ai is picked up automatically. Run /mcp to check.
If you sign in with an API key instead, add the server from a terminal:
claude mcp add --transport http kafkai https://kafkai.com/mcp
This registers the server for the current project directory. Add --scope user
to make it available in every project.
Then, inside a Claude Code session, run /mcp and follow the authentication
prompt. Alternatively, run claude mcp login kafkai from the terminal. The
same browser sign-in appears; approve it and return to the terminal. On a
machine without a browser, claude mcp login kafkai --no-browser prints the
sign-in URL to open elsewhere.
Verify the connection
Ask Claude:
List my Kafkai projects.
If the connection works, Claude calls kafkai_list_projects and shows your
projects. A new account with no projects gets an empty list. In that case,
continue with Getting Started and create one.
Once a project exists, the Example Prompts page shows what to
ask next.
Keep your data out of model training
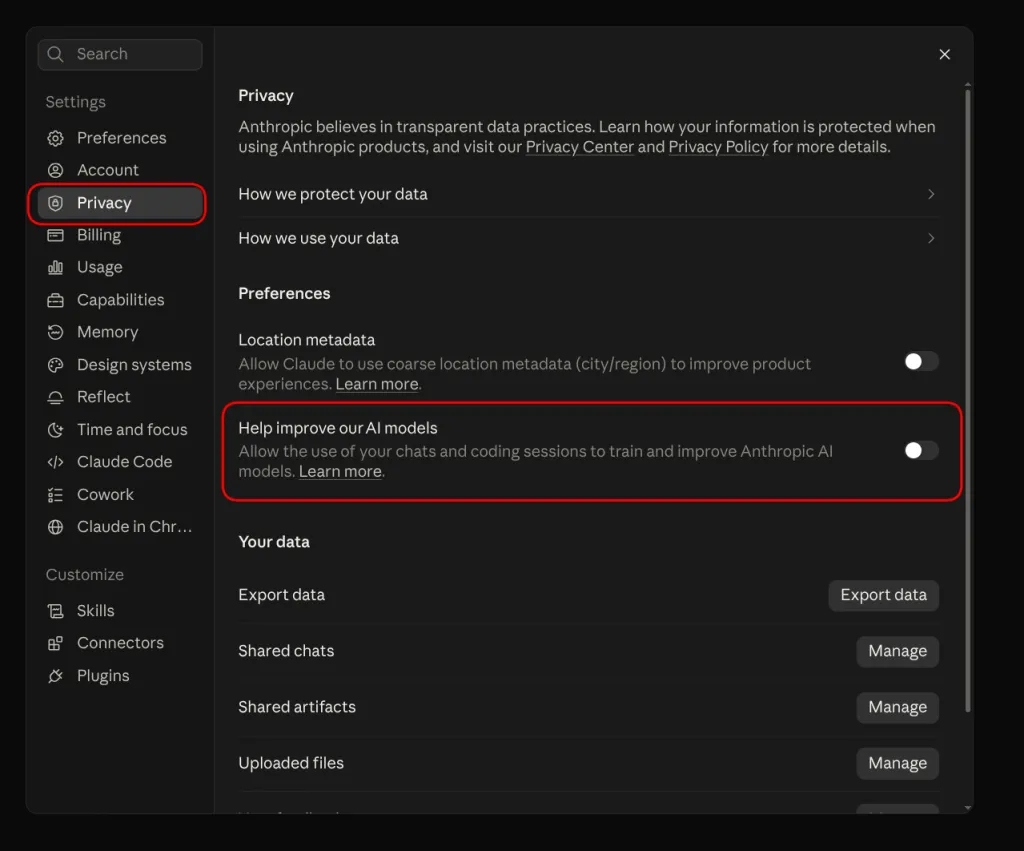
Everything Claude reads from Kafkai — your keywords, competitors, and rankings — falls under Claude's training setting. To keep that data out of model training, open Settings, then Privacy, and turn off Help improve our AI models. The setting applies to your whole claude.ai account, so it also covers Claude Desktop and Claude Code.
Disconnect Kafkai
Open the connector under Customize, then Connectors, and choose
Disconnect (in Claude Code, run claude mcp remove kafkai). Access tokens
are short-lived, so a removed connector stops working on its own shortly after.
To revoke the access from Kafkai's side, contact support.