

Documentation » Connect WordPress
Connect WordPress
Add your WordPress site to Kafkai as a publishing destination, so that your AI agent can send the articles it writes to the site. A post goes up as a draft unless you ask for it to go live, so you can check it in WordPress first.
Kafkai needs two things from WordPress:
- The username of a WordPress user who has write permission.
- An Application Password that you create for that user.
An Application Password is not the password that you use to log in
to WordPress. The login password does not work here, and Kafkai never
asks for it. If you enter the login password, the connection test fails
with Invalid credentials.
Before you begin
- The site runs WordPress 5.6 or later. Application Passwords are part of WordPress from that version, so you need no plugin.
- The site uses HTTPS. WordPress turns Application Passwords off on a site without HTTPS.
- The site is reachable from the internet, and its REST API is on. To
check, open
https://example.com/wp-json/in a browser, with your own domain in place ofexample.com. A page of data means that the API is on. - You can log in to WordPress as the user that Kafkai will publish as, or as an administrator who can edit that user.
Choose a user with write permission
An Application Password gives Kafkai the same permissions as the WordPress user it belongs to, and no more. The role of that user decides what Kafkai can do:
| WordPress role | What Kafkai can do |
|---|---|
| Administrator, Editor | Everything: save drafts, publish live, create a category that does not exist yet, update a post. |
| Author | Save drafts and publish live. A call that names a category that does not exist yet fails, because an Author cannot create categories. |
| Contributor | Save drafts only. A request to publish live fails. |
| Subscriber | Nothing. Every publish call fails. |
Use a user with the Editor role. If you do not want posts to appear under your own name, create a separate WordPress user for Kafkai, give it the Editor role, and create the Application Password for that user. WordPress shows that user as the author of each post.
For the full list of what each role can do, see Roles and Capabilities in the WordPress documentation.
1. Create an Application Password in WordPress
- Log in to the WordPress admin screen as the user that Kafkai will publish as.
- In the menu, choose Users > Profile. To create the password for another user, an administrator chooses Users > All Users and then Edit on that user.
- Write down the value of the Username field at the top of the page. This is the username that Kafkai needs. It is not the nickname and not the display name.
- Scroll to the Application Passwords section. In New
Application Password Name, enter a name that tells you what the
password is for, such as
Kafkai. - Choose Add Application Password.
- Copy the password that WordPress shows. It is 24 characters in groups of four. WordPress shows it only once, so copy it before you leave the page.
You can paste the password with or without the spaces. WordPress ignores them.
For more information, see Application Passwords in the WordPress documentation.
2. Open the publishing destinations in Kafkai
In your Kafkai account, choose Account. In the Connections section, choose Manage destinations on the Publishing destinations row. You can also open the Publishing Destinations page directly.
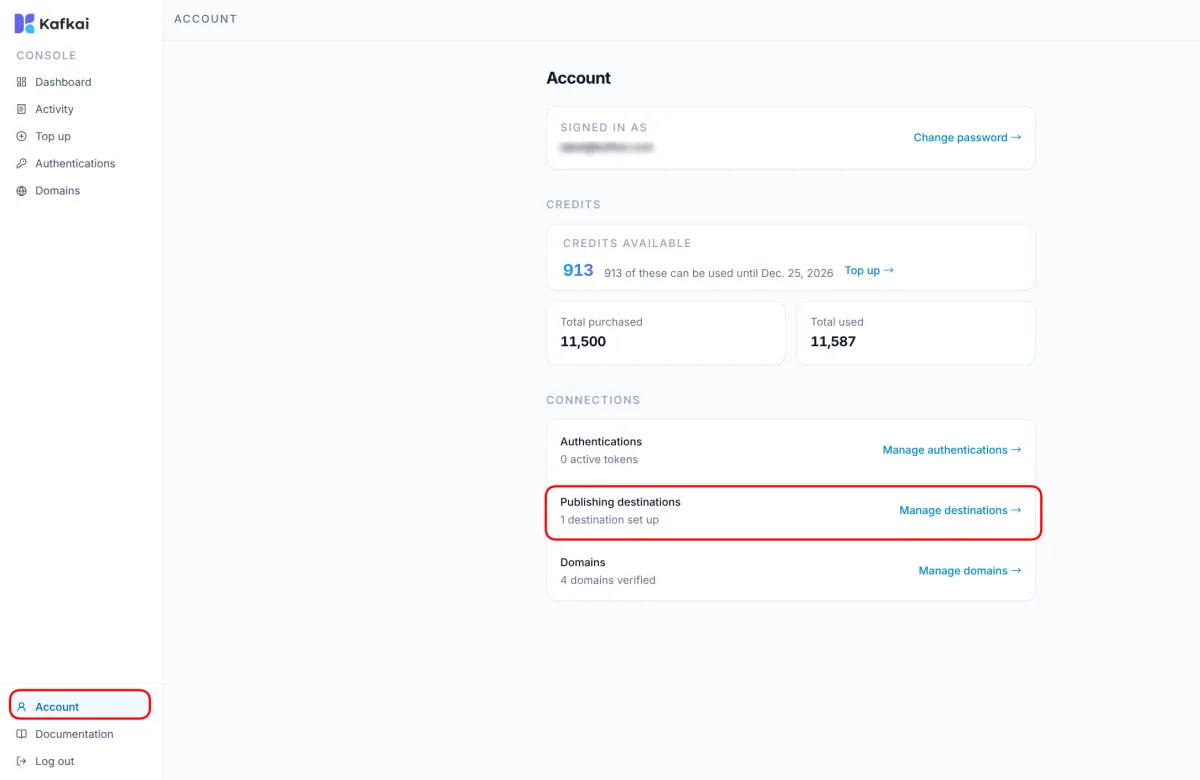
3. Add a destination
Choose Add Destination.
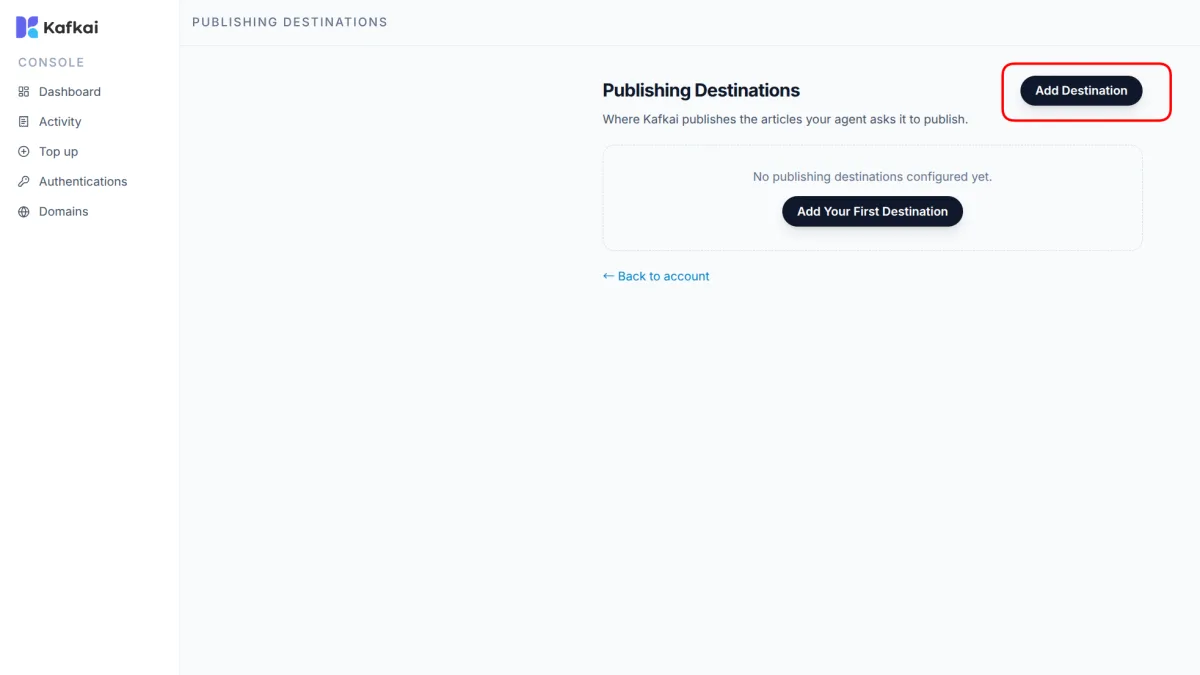
4. Enter the WordPress details
Fill in the form:
| Field | What to enter |
|---|---|
| Name | A label for the destination, such as Kichi Coffee WordPress. Your agent sees this name when it lists the destinations. |
| Type | WordPress |
| URL | The address of the site, such as https://example.com. Do not enter the address of the admin screen (/wp-admin/). |
| Authentication | Basic Auth |
| Username | The WordPress username from step 1. |
| Password | The Application Password from step 1. Do not enter the WordPress login password. |
Keep Test connection before saving selected, and choose Save.

Kafkai stores the username and the Application Password encrypted. Kafkai never shows them again, and never returns them to your agent.
Enter these details on this page, not in a chat with your agent. That way, the Application Password never appears in a conversation.
5. Check that the destination is active
When the test passes, Kafkai saves the destination. The list shows it with the Active label and the time of the last test, followed by a check mark.

To run the test again at any time, choose Test.
The test confirms that Kafkai can reach the site and that the username and the Application Password are correct. The test does not check the role of the user. A user without write permission passes the test and then fails on the first publish. To confirm the whole connection, publish one draft.
Publish a first draft
Ask your agent: "Write a short test article and publish it to WordPress as a draft with Kafkai."
The agent calls kafkai_list_publishing_destinations to find the
destination, then kafkai_publish_article to send the text. Both are
free. The agent returns
the address of the draft. In WordPress, open Posts to check the
draft, then publish it or delete it.
For the arguments of the publishing tools, see Publishing in the tool reference.
To publish somewhere that is not a WordPress site, see Connect a Webhook.
If the connection test fails
The form shows Connection test failed: followed by the reason.
| Reason | What to check |
|---|---|
Invalid credentials |
The password is not an Application Password, or the username is wrong. Create a new Application Password and paste it again. Enter the WordPress username, not the display name. |
Access forbidden |
A security plugin or a firewall blocks the request. Allow access to the WordPress REST API. |
WordPress REST API not accessible |
The REST API is off or blocked, or the URL is not the address of the site. Open https://example.com/wp-json/ in a browser to check. |
WordPress site returned non-JSON response |
The URL is wrong, or the site shows a maintenance page or a login page to visitors. |
Cannot connect to WordPress site |
The URL has a typing error, or the site is not reachable from the internet. |
Connection timeout |
The site did not answer in time. Try again. |
If the username and the Application Password are correct and the reason
is still Invalid credentials, the server may remove the login details
from the request before WordPress reads them. Ask your hosting provider
whether the server passes the Authorization header to WordPress.
If WordPress shows no Application Passwords section
- The site does not use HTTPS. WordPress shows a message in place of the form. Turn HTTPS on for the site.
- A security plugin turned the feature off. Some security plugins disable Application Passwords by default. Turn the feature on in the settings of the plugin.
- The whole site is behind a server-level password prompt. WordPress reports that Basic Authentication is not compatible with Application Passwords. Remove that password prompt.
- WordPress is older than 5.6. Update WordPress.
If the test passes but publishing fails
kafkai_publish_article returns the reason that WordPress gave.
- The user has no write permission. WordPress answers that the user is not allowed to create or publish posts. Change the role of the user to Editor in WordPress. You do not need a new Application Password. The existing one follows the new role.
- The category does not exist and the user cannot create it. Create the category in WordPress first, or change the role of the user to Editor.
For other errors, see Troubleshooting.
Remove the access
To stop Kafkai from publishing to the site, open Users > Profile in WordPress. In the Application Passwords section, choose Revoke on the row of the password that you created for Kafkai. Kafkai can no longer publish to the site from that moment. The login password and other Application Passwords of the user do not change.
To remove the destination from Kafkai too, choose Delete on the destination in the Publishing Destinations page. Posts that Kafkai already published stay on your site.