# Connect ChatGPT
Connect Kafkai to ChatGPT as a custom plugin — ChatGPT's name for an MCP server
that you add yourself. The server URL is:
```
https://kafkai.com/mcp
```
**You need a ChatGPT plan that allows custom plugins. You must also turn on
developer mode**. OpenAI moves these menus from time to time — if the steps
below do not match what you see, search ChatGPT's settings for "developer mode"
or "plugins".
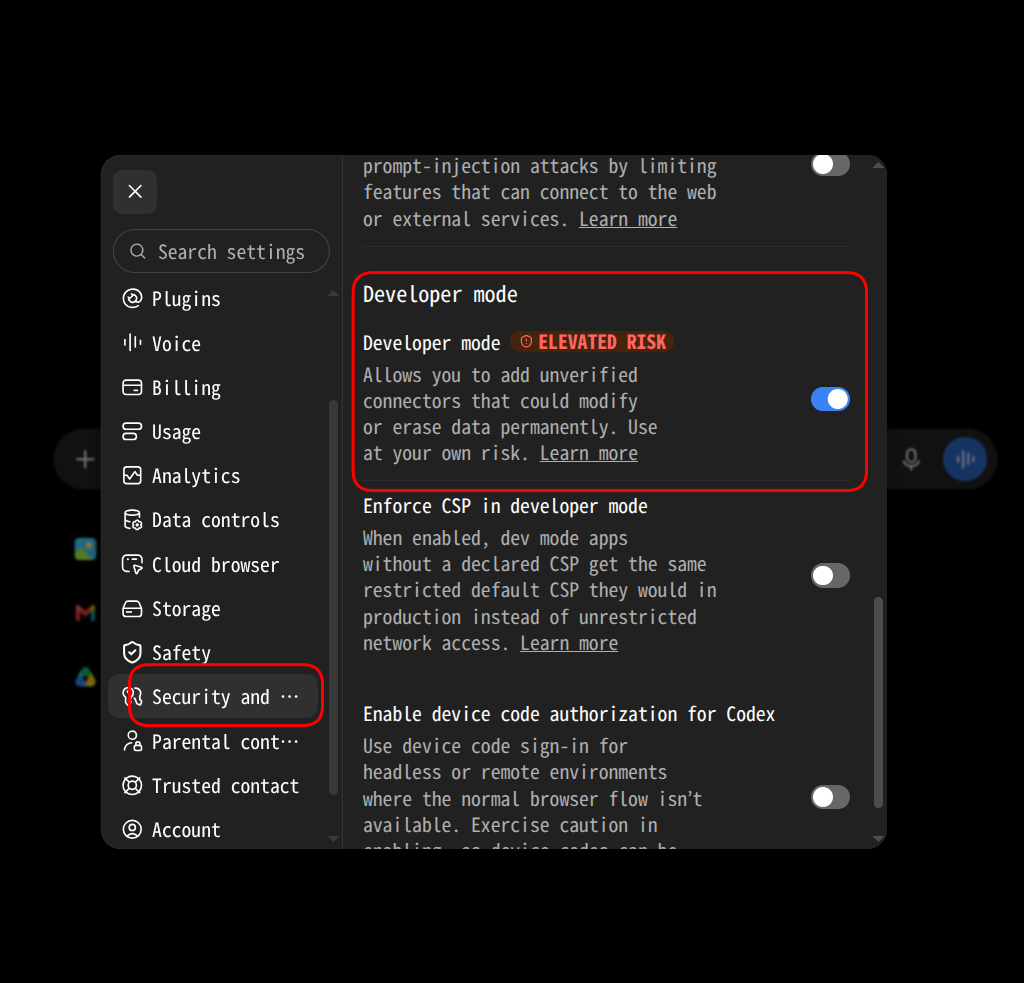
## 1. Turn on developer mode
1. Open **Settings**, then the **Security** section.
2. Turn on **Developer mode**.
ChatGPT marks developer mode as elevated risk because it lets you add plugins
that OpenAI has not reviewed. Kafkai is one of those. Every tool it exposes is
listed in the [Tool Reference](https://kafkai.com/en/docs/tools/), and none of them can reach
anything outside your Kafkai account.
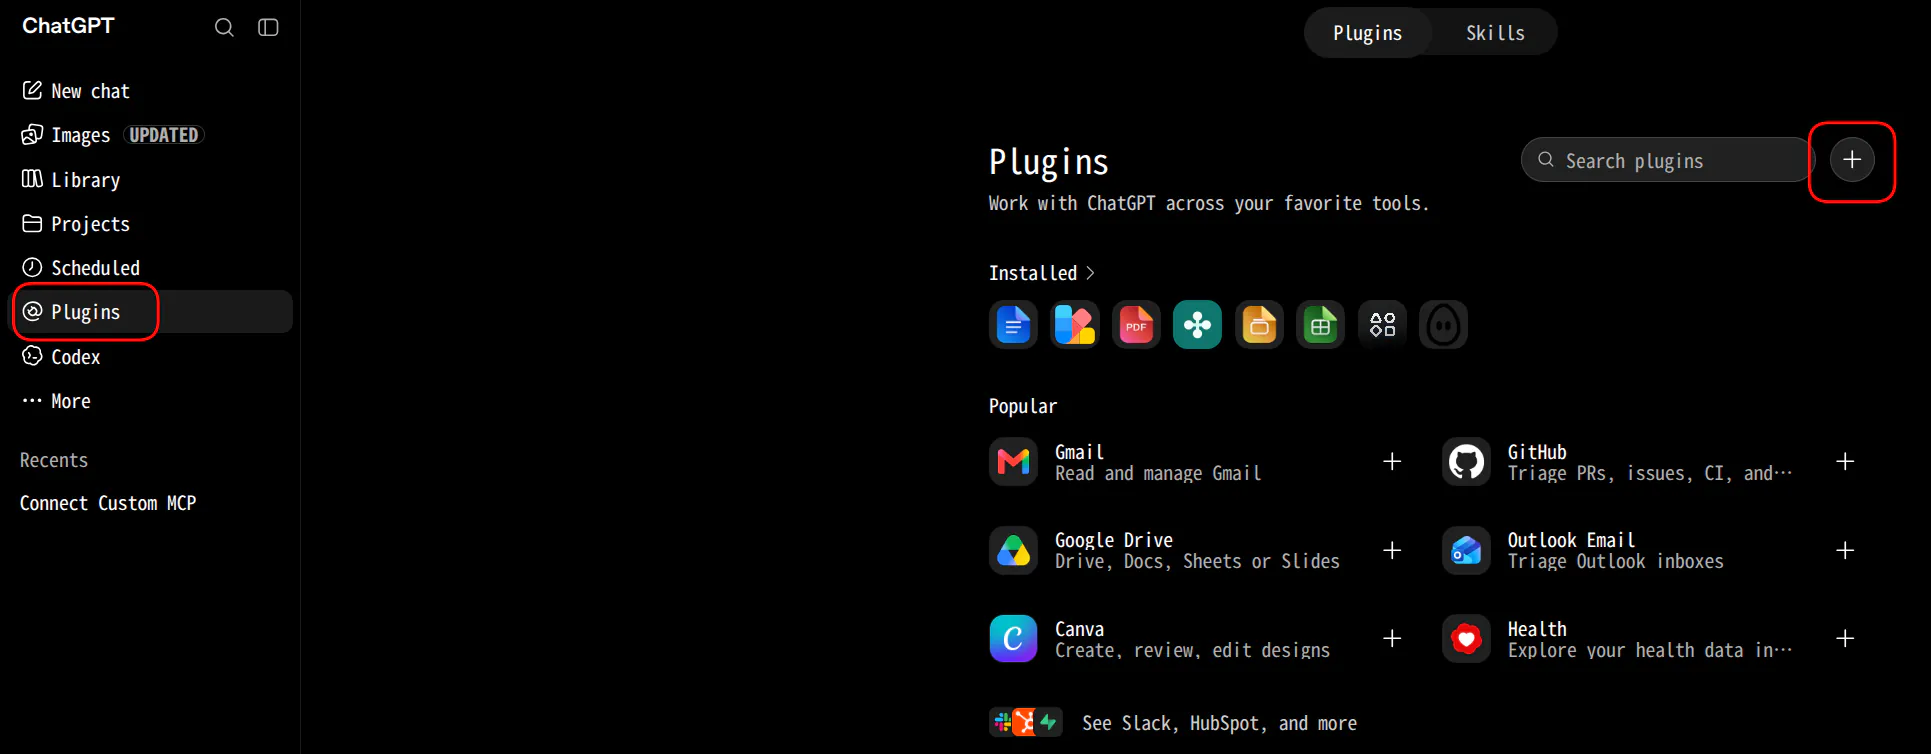
 ## 2. Add a new plugin
1. In the sidebar, choose **Plugins**.
2. Choose the **+** button next to the search box.
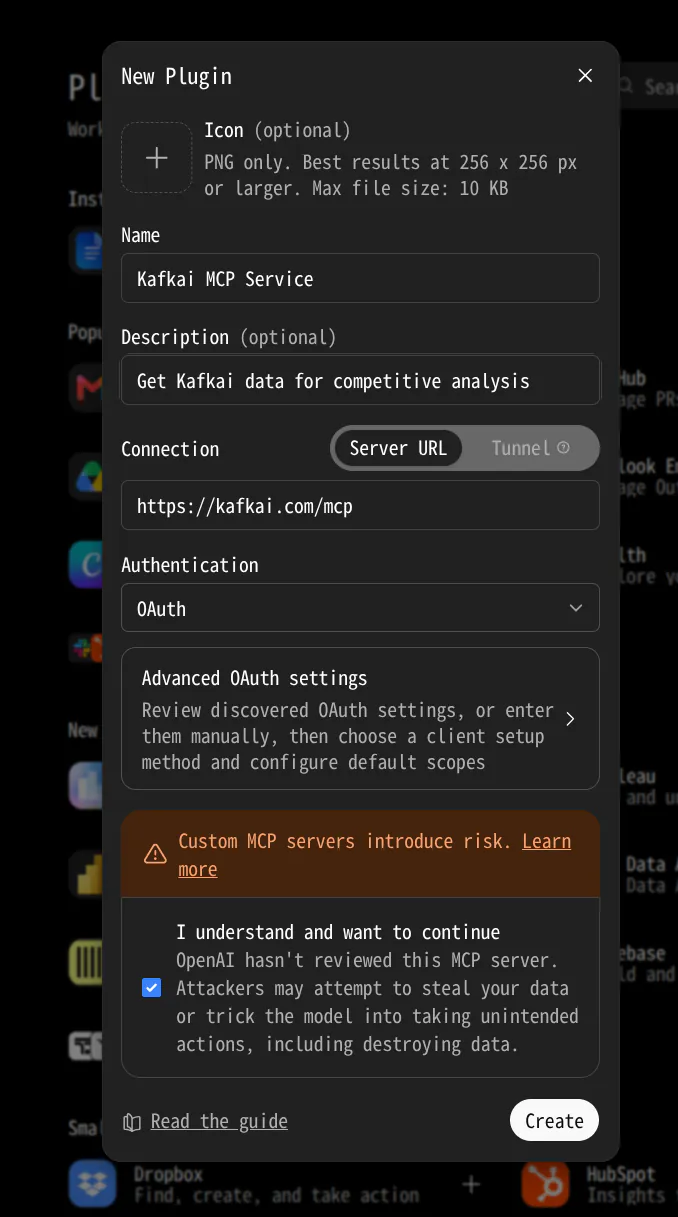
 ## 3. Fill in the plugin form
1. **Name**: `Kafkai MCP Service`, or any name you like. It is shown in your
plugin list.
2. **Description**: optional.
3. **Connection**: keep **Server URL** selected and enter
`https://kafkai.com/mcp`.
4. **Authentication**: **OAuth**. Leave **Advanced OAuth settings** as they
are — ChatGPT registers itself with the Kafkai server, so there is no
client ID or secret to copy.
5. Select the **I understand and want to continue** checkbox, then choose
**Create**.
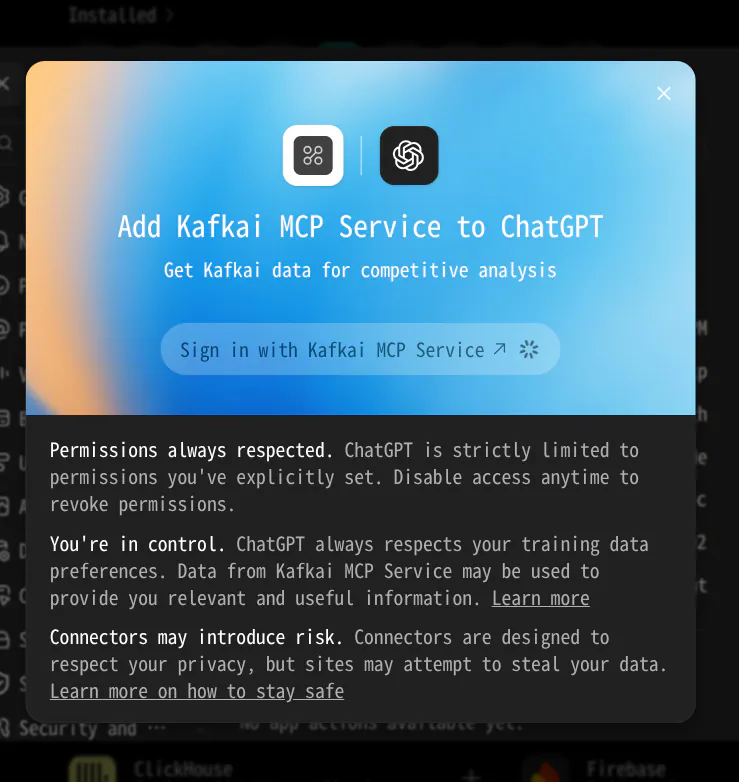
 ## 4. Sign in to Kafkai
ChatGPT shows **Add Kafkai MCP Service to ChatGPT** (the button carries the
name you gave the plugin). Choose **Sign in with Kafkai MCP Service**.
A Kafkai page opens in a new tab. Sign in with your Kafkai account, then
choose **Allow** on the authorization page.
 ## Use the plugin in a chat
In a new conversation, enable the Kafkai plugin from the tools menu, then ask:
> List my Kafkai projects.
If the connection works, ChatGPT calls `kafkai_list_projects` and shows your
projects. From there, the prompts in [Getting Started](https://kafkai.com/en/docs/getting-started/)
and on the [Example Prompts](https://kafkai.com/en/prompts/) page apply as-is.
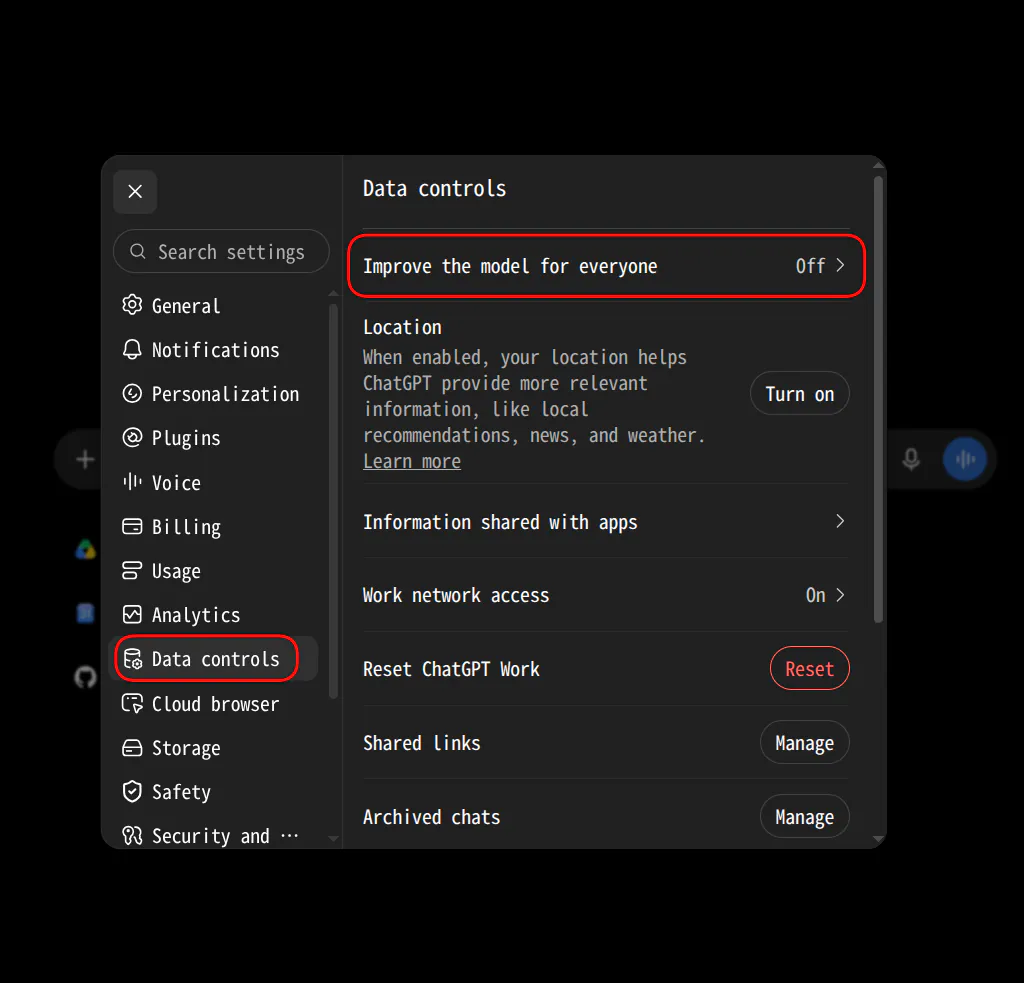
## Keep your data out of model training
Everything ChatGPT reads from Kafkai — your keywords, competitors, and rankings
— falls under ChatGPT's training setting. To keep that data out of model
training, open **Settings**, then **Data controls**, and set
**Improve the model for everyone** to **Off**.
 ## Use a static API token
Some ChatGPT setups only allow plugins with header authentication. In that
case, create a static API token and follow
[Connect Hermes and Other Clients](https://kafkai.com/en/docs/connect-hermes/) — the token works
the same way in ChatGPT's plugin form.
## Disconnect Kafkai
Open **Plugins**, open Kafkai under **Installed**, and remove it. Access tokens
are short-lived, so a removed plugin stops working on its own shortly after.
To revoke the access from Kafkai's side, contact [support](https://kafkai.com/en/contact/).